This is a pretty simple card but pretty. The picture doesn't do it justice because I used my phone and didn't have great lighting. The paper is shimmery and I heat embossed the snowflakes and title.
Tuesday, October 30, 2012
Saturday, October 27, 2012
Wednesday, October 24, 2012
autumn trees
I made this card front to cover the end of a display box at work hence the purple edges.
papers: Paper Cut
ribbon: May Arts
stamp: Memory Box
embossing powder: Judikins Chablis
Sunday, October 21, 2012
"you're invited"
I made this little Halloween invite at work a few weeks ago. I love these little ghosts! They are actually a dimensional ribbon by May Arts which I cut apart to add a fun touch.
Thursday, October 18, 2012
"what cancer cannot do"
I made these tags/bookmarks for my brother-in-law's annual "Throwing for the Cure" event. They were created in all different colors and raised money for a great cause. I donated the remaining amount to help raise funds at a benefit for a young woman whose cancer has returned.
Friday, July 20, 2012
Tuesday, July 17, 2012
butterfly cards
punch - Stampin' Up! (retired)
stamps - Stampin' Up! Butterfly Prints and Flight of the Butterfly (both retired)
inks - Stampin' Up! Pear Pizazz & Concord Crush (both retired) and Wisteria Wonder
ribbon - Offray and unknown (ric rac)
extras - Sakura Stardust pen and Recollections pearls
Saturday, July 14, 2012
stampin' up! club cards
These are just a few of the cards I've made in the last few months since joining some friends in a Stampin' Up! stamp club. I'm having a lot of fun learning some new techniques and adding to my supplies.
NOTE: I did not design these cards. Jen, our Stampin' Up! demonstrator, either designed them or found them on the website that Stampin' Up! demonstrators use to share their ideas.
Thursday, July 12, 2012
father's day card
This is the card I made for my father-in-law for Father's Day.
supplies:
cardstock - Core'dinations. WorldWin
stamp: Ditto
ink: VersaMark
embossing powder: The Goose Barn
color: Sakura Stardust pens
gems: Studio 16
Wednesday, June 20, 2012
farm animal baby book
My sister asked me to create an 8x8 animal for a friend's baby shower. The baby room theme is farm animals and yellow so I decided to create something with that theme. I repeated some of the pages to keep the album more uniform because I didn't want to limit the new parents to what they would want to put on the pages.


supplies:
cardstock: Core'dinations, Bazzill
patterned paper: Paper Studio
ribbon/fiber: May Arts
brads: Recollections
tools: Cricut & Animal Kingdom cartridge and Martha Stewart double loop border & corner punches
supplies:
cardstock: Core'dinations, Bazzill
patterned paper: Paper Studio
ribbon/fiber: May Arts
brads: Recollections
tools: Cricut & Animal Kingdom cartridge and Martha Stewart double loop border & corner punches
Sunday, June 17, 2012
graduation card
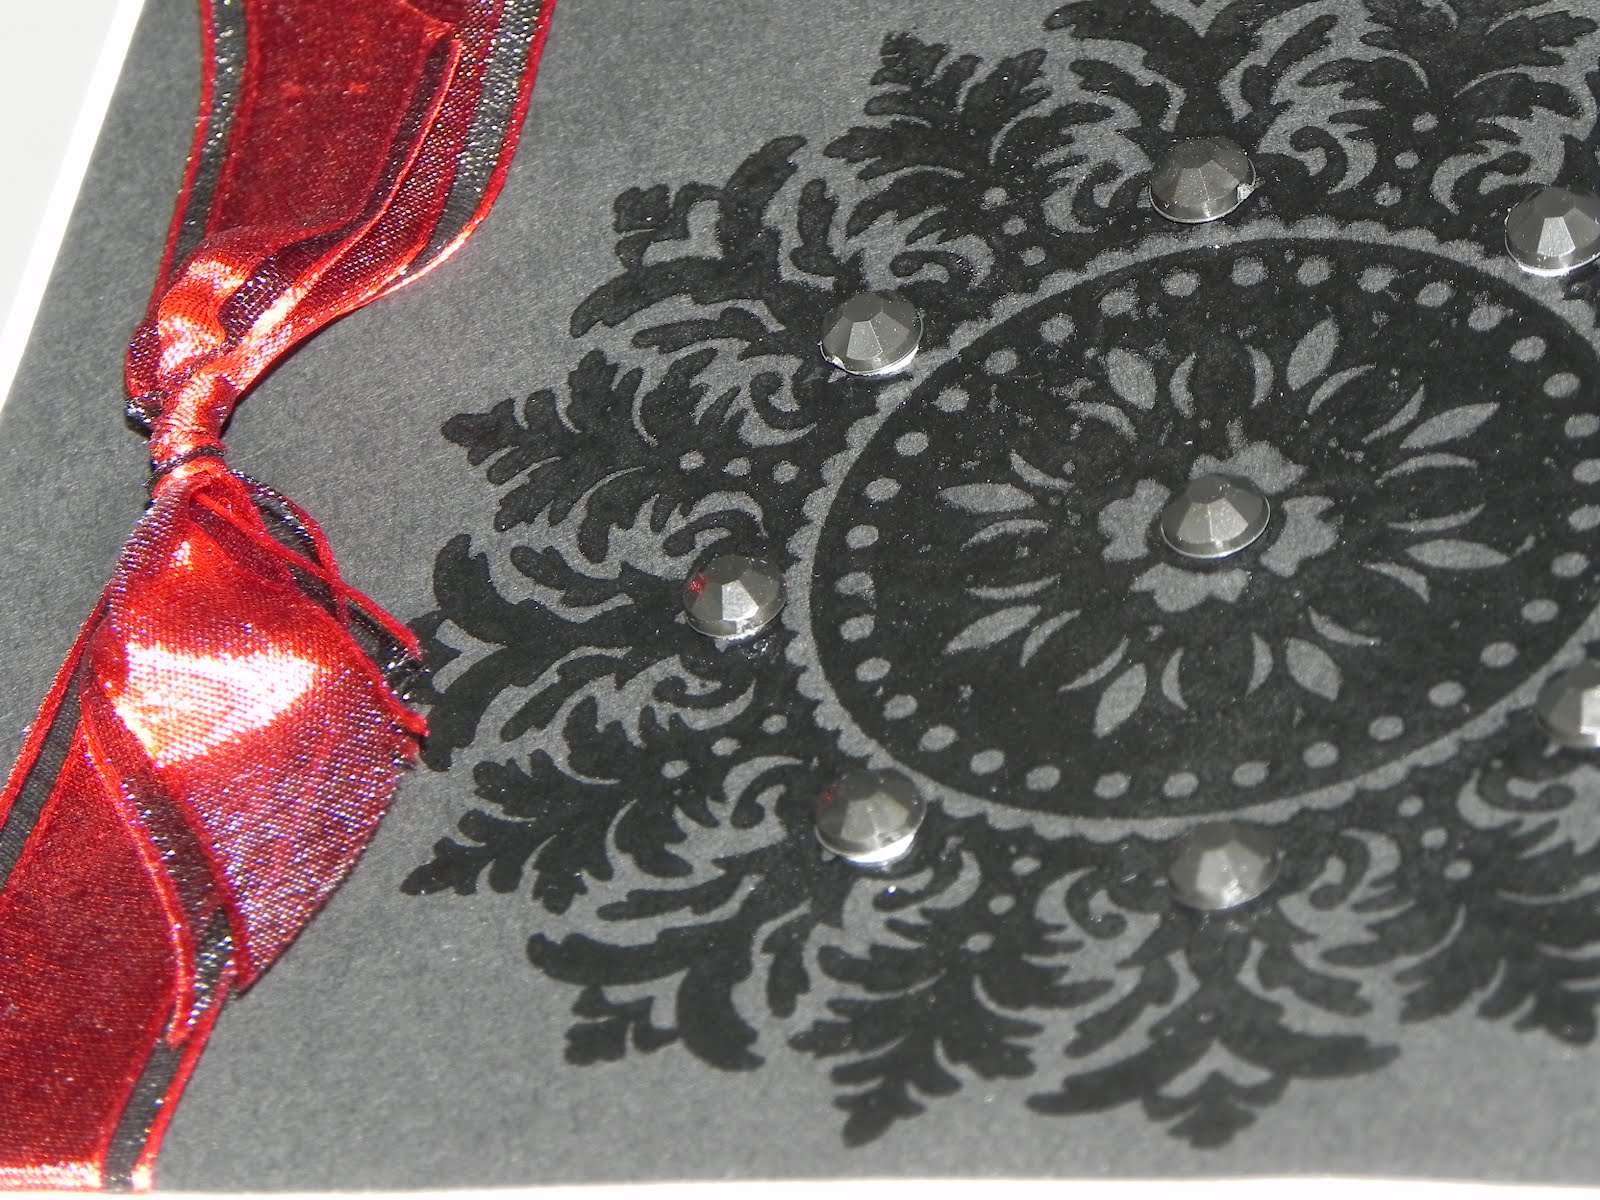
This graduation card was made for my nephew for his high school graduation. His school colors were red & black with white which I used for his card.


supplies:
cardstock - Core'dinations
ribbon - Celebrate It! (Michaels)
stamp - Medallion (Stampin' Up!)
embossing powder - The Goose Barn (clear)
bling - Darice
tools - VersaMark pad & heat gun
supplies:
cardstock - Core'dinations
ribbon - Celebrate It! (Michaels)
stamp - Medallion (Stampin' Up!)
embossing powder - The Goose Barn (clear)
bling - Darice
tools - VersaMark pad & heat gun
Saturday, June 9, 2012
new work station (part 2)
I'm ready to share the final look with you. I've moved a few different things a few times and I'm sure I might move some things later but not in a way it'll impact the look of my scrap room.
This is right outside the door to my scrap room. I already know it won't be this neat & tidy all the time but I've made storage easier than it was so clean up should be easier now.
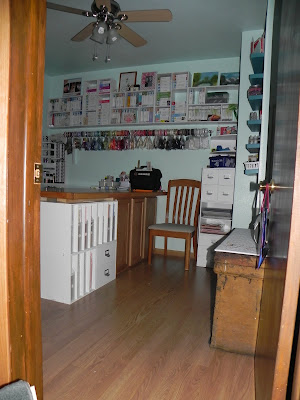
I decided it was best to move all of my paper storage under the work station. This allowed that small wall to be opened up for a bit more floor space.
This was taken from the very end of the work station.
This is from the other corner of the room. I wanted to share the different views of the room with you.
I hope you enjoyed this little view of my room. Hopefully you were able to gain a bit of inspiration to use in your room/area as well.
Thank you for visiting!
This is right outside the door to my scrap room. I already know it won't be this neat & tidy all the time but I've made storage easier than it was so clean up should be easier now.
I decided it was best to move all of my paper storage under the work station. This allowed that small wall to be opened up for a bit more floor space.
This was taken from the very end of the work station.
This is from the other corner of the room. I wanted to share the different views of the room with you.
I hope you enjoyed this little view of my room. Hopefully you were able to gain a bit of inspiration to use in your room/area as well.
Thank you for visiting!
Friday, June 8, 2012
new work station (part 1)
I've decided that what I was using as a work station was just too small so I went price checking a week or two ago. I decided I wanted a work station that could be used by multiple people and not be shoved against a wall. I've been looking at Pinterest gathering ideas. I found a LOT of ideas I loved ... if only my room was twice as big as it is. Anyway, I decided to go with some unfinished cabinets to use along with some of my JetMax cubes for the base and an exterior wood slab door for the top.
Here are shots of parts of my new work station after the first coat of color.
Check back tomorrow for shots of the finished project.
Thank you for visiting!
Here are shots of parts of my new work station after the first coat of color.
Check back tomorrow for shots of the finished project.
Thank you for visiting!
Wednesday, June 6, 2012
stamp pad organization
I've been busy again with some new organization for my craft room. I roped my husband into helping me out on this one ... that extra set of hands was an enormous help on this project.
I had an extra set of JetMax shelves in the closet just collecting dust so I decided to make them into what I needed. One of the shelves is the back and the other shelf was cut to make the shelves. There was a lot of sawing & drilling involved ... thank you hubby! The "racks" are CD/DVD holders called Media Stix that I purchased at Target. They were around $13 for the 4 pack and hold 60 items in total. The pads that fit well are Stampin' Up! and Craft Smart (Michaels). The pads that are too thick are VersaMark, Staz On, Distress Ink and Stampabilities (Hobby Lobby) which is why I did the shelves as well.
I love that I'm able to keep my embossing/heat gun on the bottom shelf along with my embossing powders.
I've been busy with another project that I would like to share with you so check back in a couple days to see what I have to share with you.
Thank you for visiting!
I had an extra set of JetMax shelves in the closet just collecting dust so I decided to make them into what I needed. One of the shelves is the back and the other shelf was cut to make the shelves. There was a lot of sawing & drilling involved ... thank you hubby! The "racks" are CD/DVD holders called Media Stix that I purchased at Target. They were around $13 for the 4 pack and hold 60 items in total. The pads that fit well are Stampin' Up! and Craft Smart (Michaels). The pads that are too thick are VersaMark, Staz On, Distress Ink and Stampabilities (Hobby Lobby) which is why I did the shelves as well.
I love that I'm able to keep my embossing/heat gun on the bottom shelf along with my embossing powders.
I've been busy with another project that I would like to share with you so check back in a couple days to see what I have to share with you.
Thank you for visiting!
Saturday, May 19, 2012
graduation card
This is a graduation card I made last week as well. The stamps I used for this card are "Agapanthus Cluster" from Stampendous and the quote is by DRS. The paper is from The Paper Cut and the embossing powders are pearl blue (unknown) & black sparkle (The Goose Barn).
I took the pictures with my phone, which explains the poor quality, but you can still get an idea of what I did.
Subscribe to:
Posts (Atom)